Fancy a two night walking and camping trip in the Lake District? This is the route for you! A couple of weeks ago, I walked with my boyfriend and one of our university friends from Windermere to Glenridding with two nights camping – though you could easily do with only one night if you manage to get to Patterdale or Glenridding in good time for the bus! However long you spend out there, this is a fantastic route to pass through quite a lot of the Lake District and bag some Wainwrights en route. Although we hiked three peaks, there are a couple more nearby that you can add if you’re feeling fresh in the legs. Want to know more? Let’s get into it.
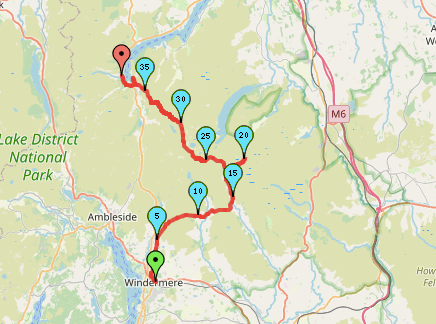
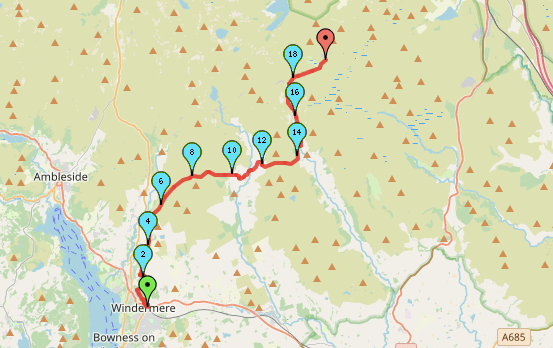
The walk begins in Windermere and, as this is not a circular route, you will need overnight parking if you are driving or public transport. We opted to get the bus into Windermere as this saved us money on car parks. If you live or are staying in the area, Stagecoach have (as of May 2024) continued their £2 per journey fare cap so it is a very cheap way of doing this. Then, on arrival in Windermere, we picked up a map from the Windermere Tourist Information Centre right next to the bus station. We owned all the other Lake District maps but OL7 was the one that we were missing and naturally the one required for the route we had planned out. The decision making was purely based around the elevation and what was doable with our big rucksacks having not walked with them in a while as well as bus routes throughout the lakes. After heading down to the Sainsbury’s to load up on food and water, we headed out!
Difficulty: Easy for those with experience of walking with a rucksack.
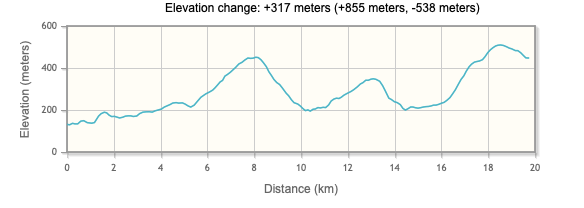
Distance: 39.5km (day 1: 20km, day 2: 19.5km)
Elevation Change: Elevation change: +27 meters (+1544 meters, -1517 meters)
OS Map: OL7
Notable Features: Mosedale Cottage, Harter Fell, Mardale Bell III, High Street, Blea Water, Haweswater Reservoir, Angle Tarn
Look Out For: Mountain Ringlet Butterfly, Buzzard,

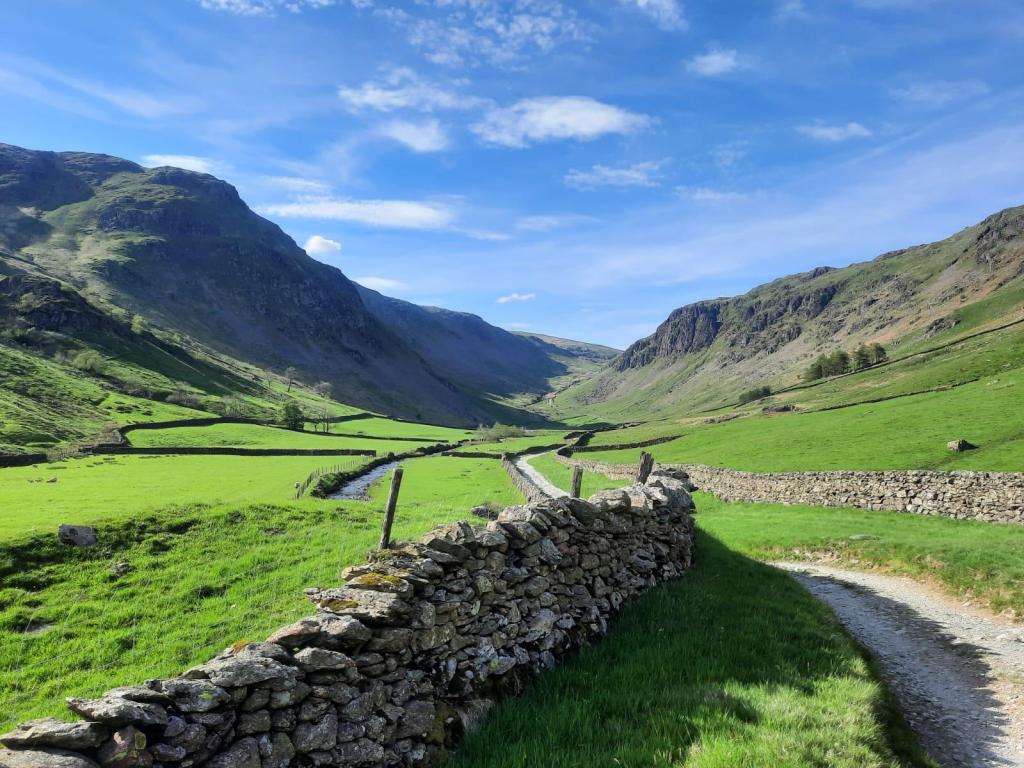
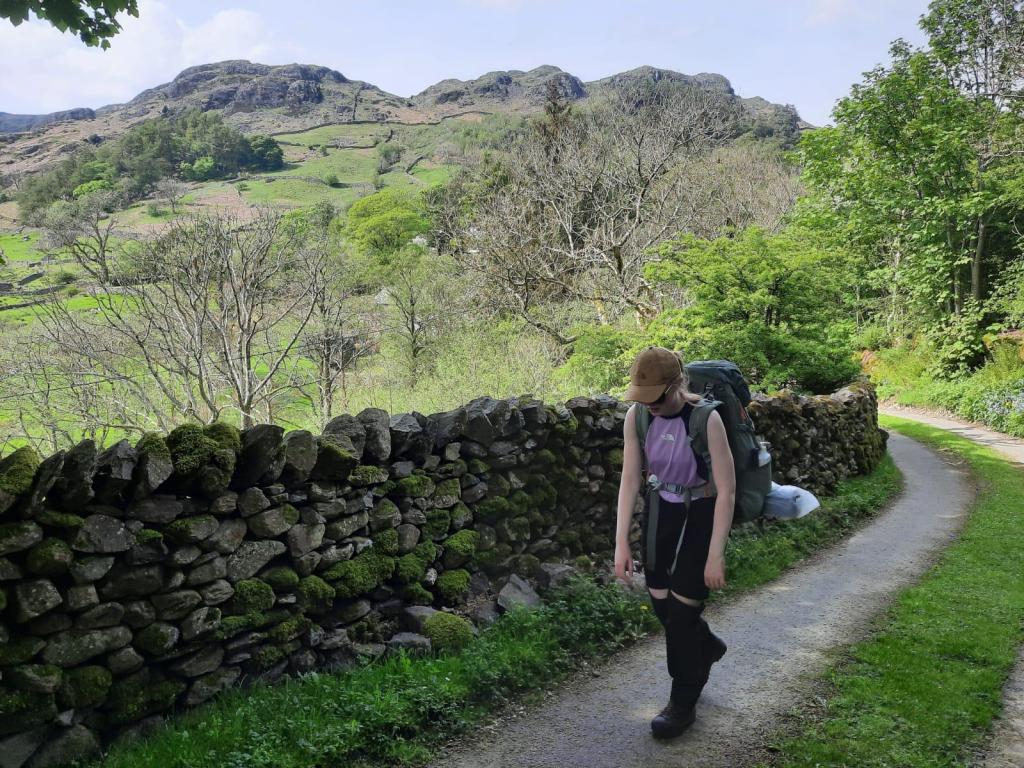
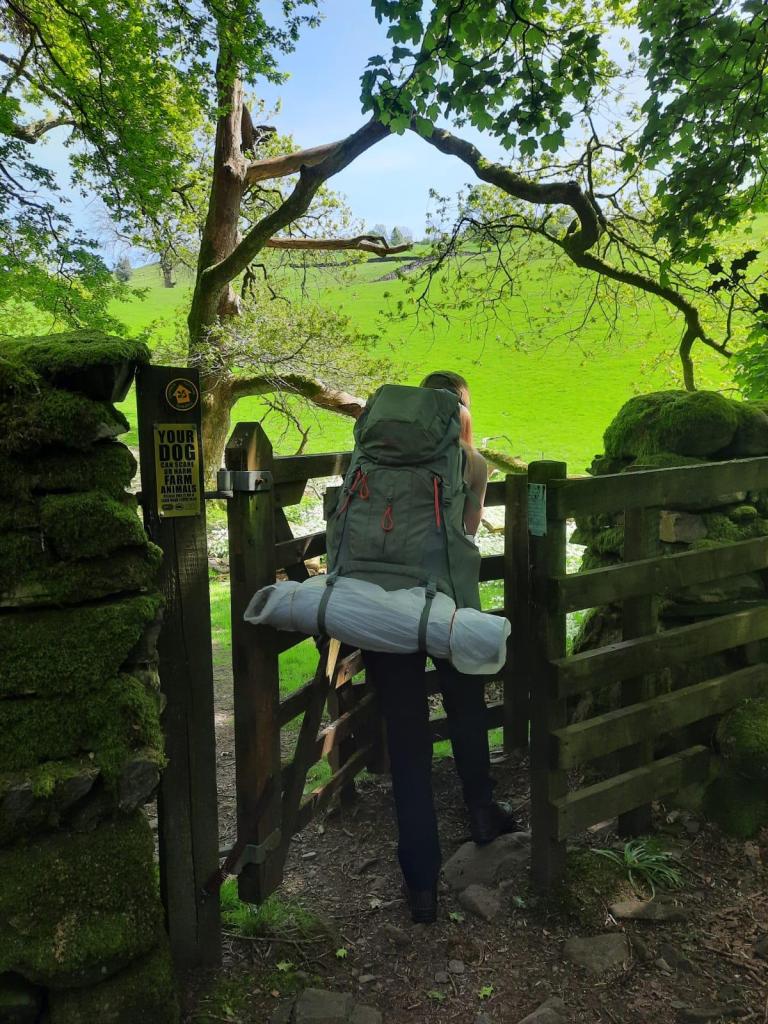
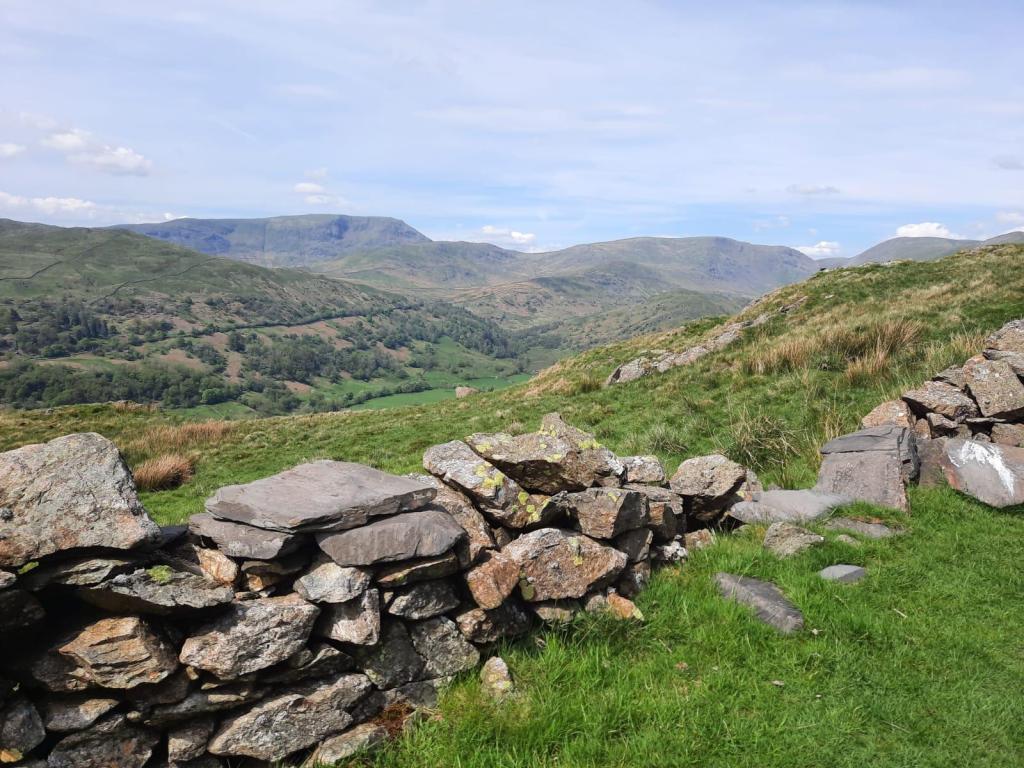
My favourite aspect of the start of the route was how varied it was. Initially, we were walking alongside houses on narrow paths and then, into a woodland area, on to fields of sheep and through farmyards. It was definitely a different way to begin than a usual wainwright day walk in the lakes which start onto the hills from the offset. We had to get out there first. It was a lovely day weather wise as well – very hot actually and it was lovely to see so many people out. During the first day of the walk, we came across the route of a super marathon which is damn impressive even when its not swelteringly hot (by UK standards). Everyone was so lovely too, fellow hikers usually are!
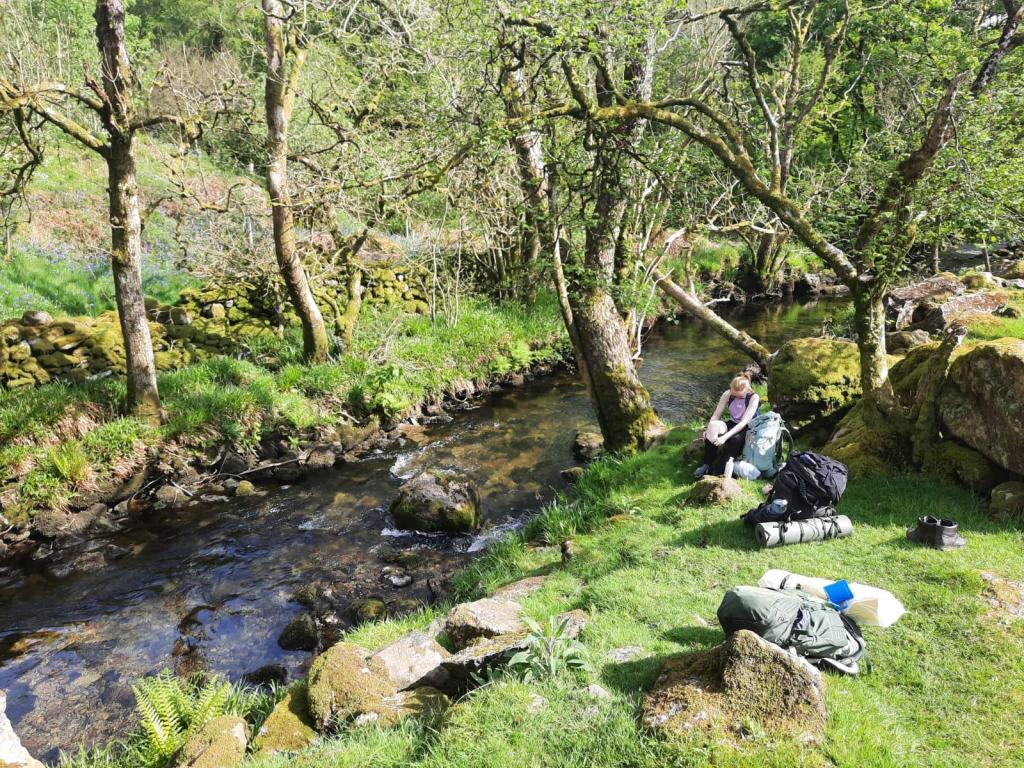
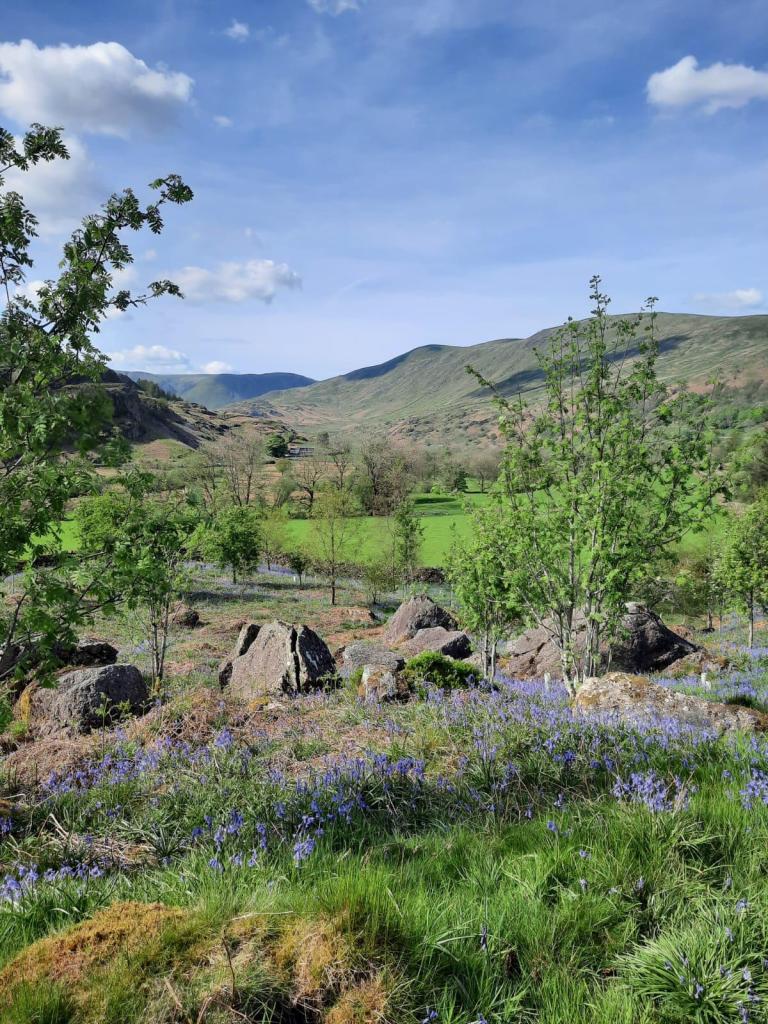
Our lunch spot for day one was alongside the River Kent in Kentmere and it was glorious. We had picked up a meal deal from the Sainsbury’s and we were very much ready for it when we arrived. I always find I have to push through that last kilometre before lunch time, especially because we always have a later lunch when we’re walking. It was a lovely place to stop though and I’m glad we pushed on to that spot. This also marked 11km into the walk which was just over half way too, perfect!
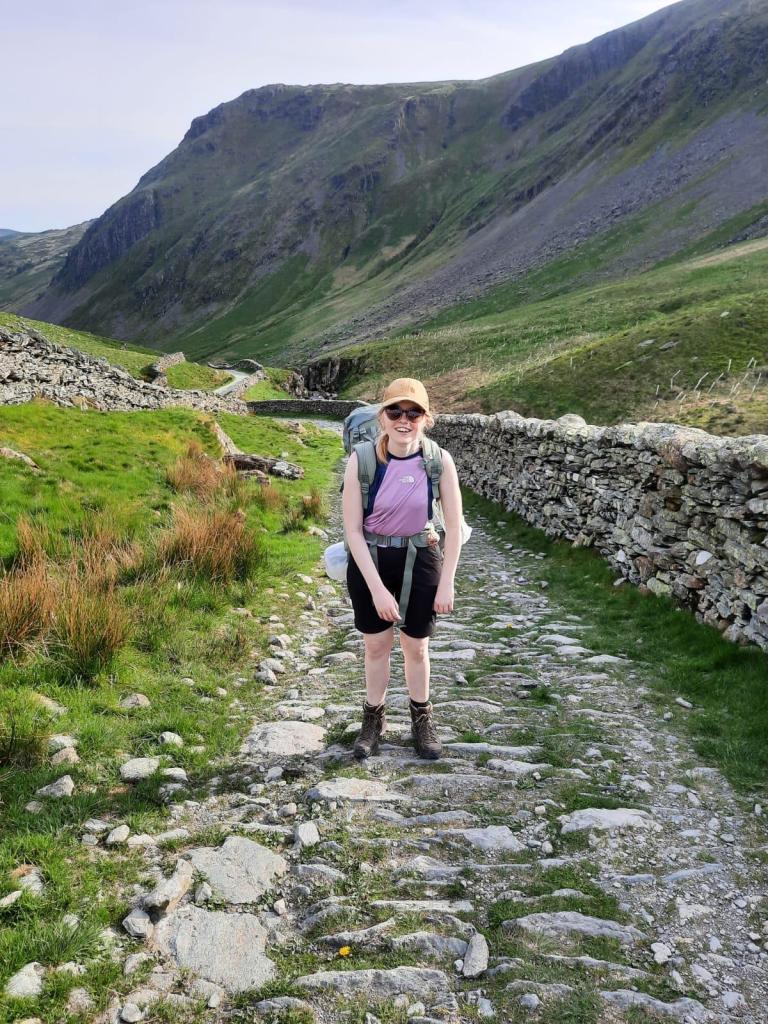
As I said, we specifically picked a route that didn’t gain too much height however, no hills is impossible an area like the Lake District so the elevation gain for day one is 855 metres with the highest points being before you dip down into the valley where Kentmere is located and at the very end of day one. The final uphill stretch from Sadgill down Gatescarth Pass was a tricky part of the walk for me as I was naturally getting quite tired at this point. Day one is a total of 20km which is a decent length without the addition of the camping rucksack. It is safe to say I was very happy to see the Bothy appear in the valley despite the lovely day of hiking.
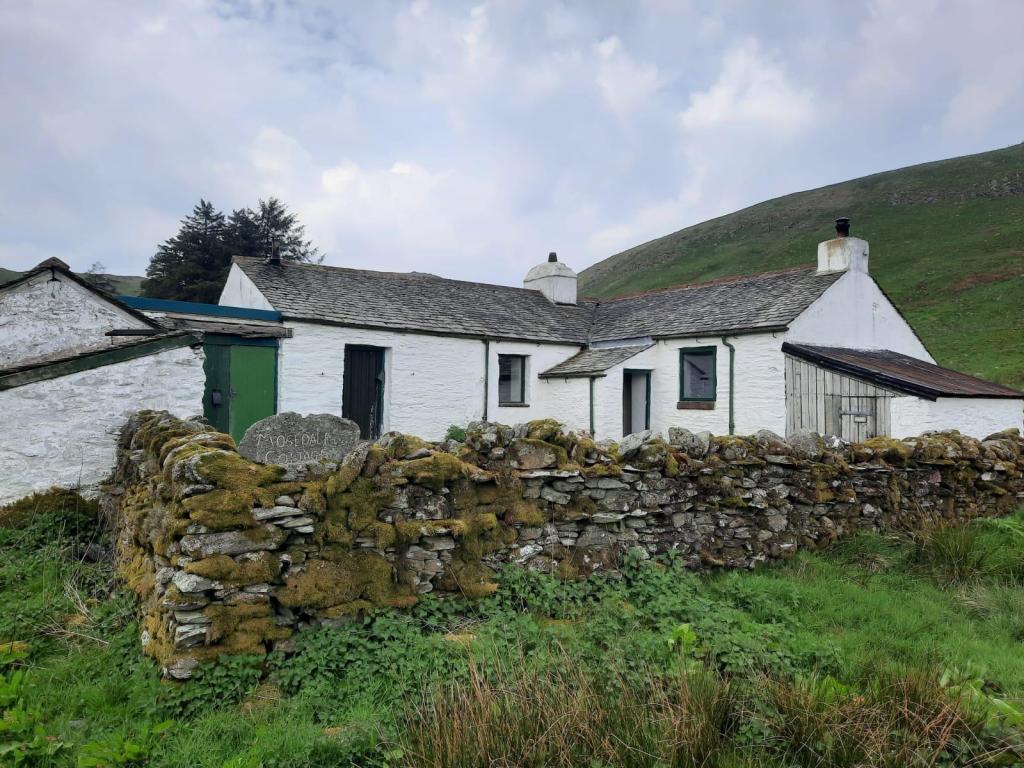
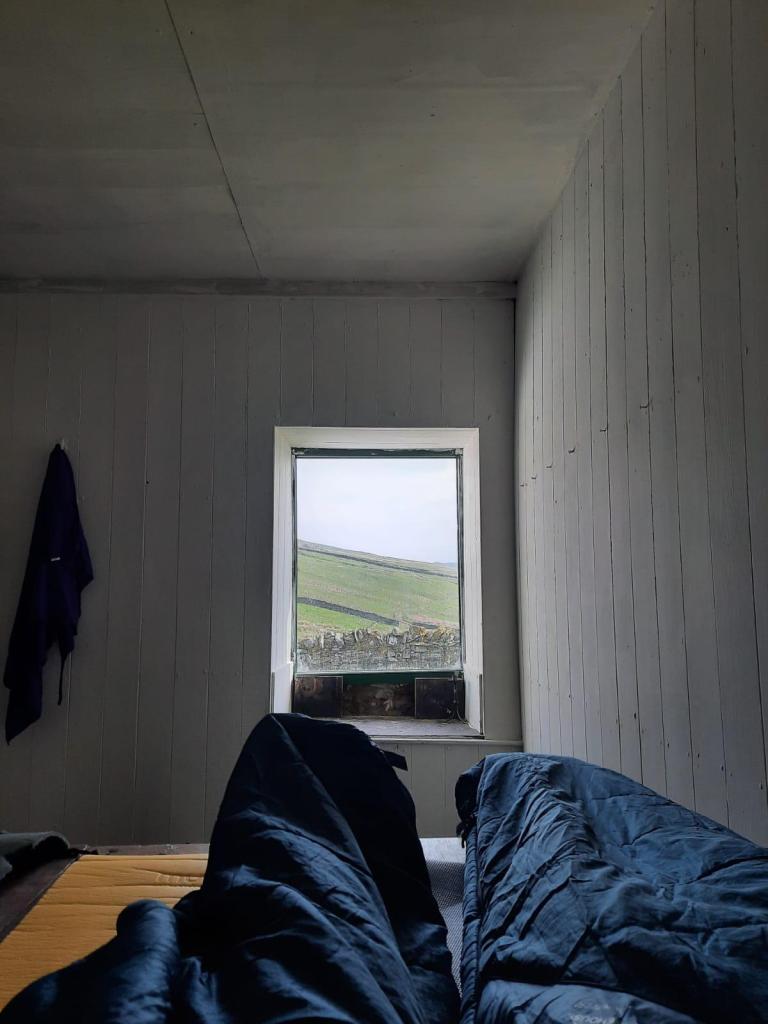
It was our first night in a bothy! Do I want to relive the experience? I’m not sure. I think I’ll do a full blog post on our night in the bothy soon but, for the sake of this route I’ll share some details now. We spent the night in Mosedale Cottage which is a large bothy maintained by the Mountain Bothies Association. I was surprised by how big this bothy was after only seeing Dubs Hut and Warnscale Head in the Haystacks region of the Lakes before but, this one is huge! It has a large open space that acts as a kind of ‘living’ area with a table, chairs and fireplace. It then has four rooms which act as bedrooms with wooden benches for you to sleep on. Some of these had a bit of damp but, it was overall very well maintained. It even had a toilet! Read: a smelly hole in the ground that smelt very bad so we didn’t use. All in all, I was impressed by the bothy however, we didn’t get all much sleep and I think I feel safer in a tent, ironically. That being said, the weather conditions were perfect during the night so, had it been raining or we were caught in the thunderstorm which had been forecast, we would have been very very lucky to be in the bothy. If I’m ever out in bad weather, I know where I’d go. We were also lucky enough to have the whole place to ourselves, this being one of the more out-of-the-way bothies in the Lakes.
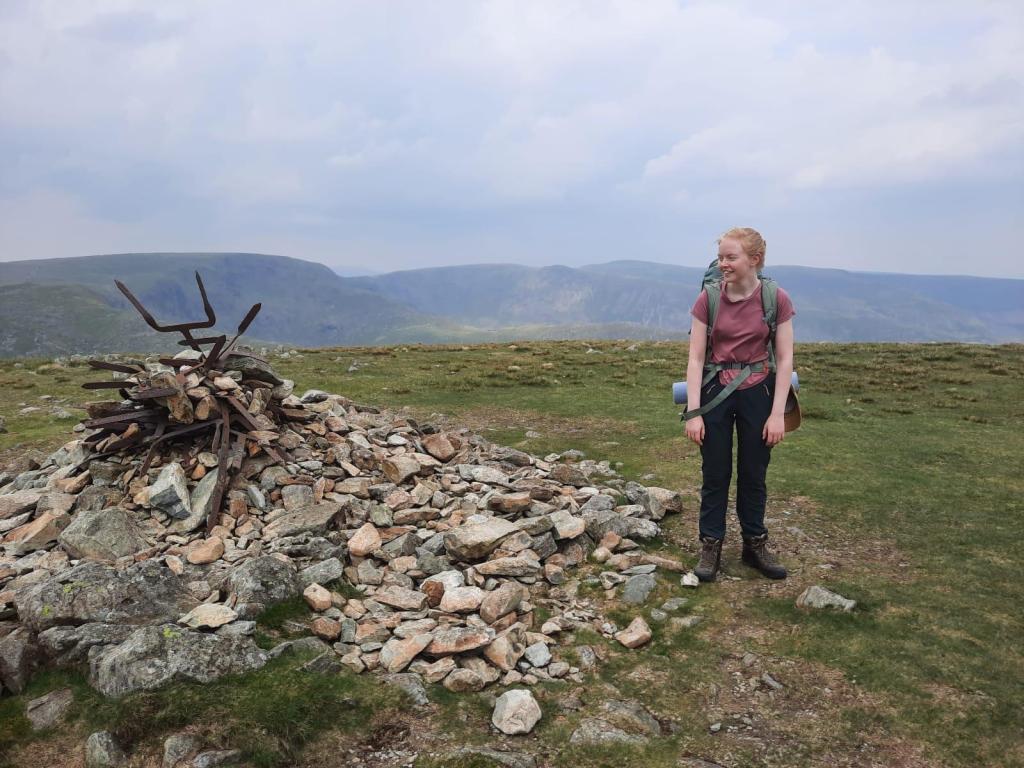
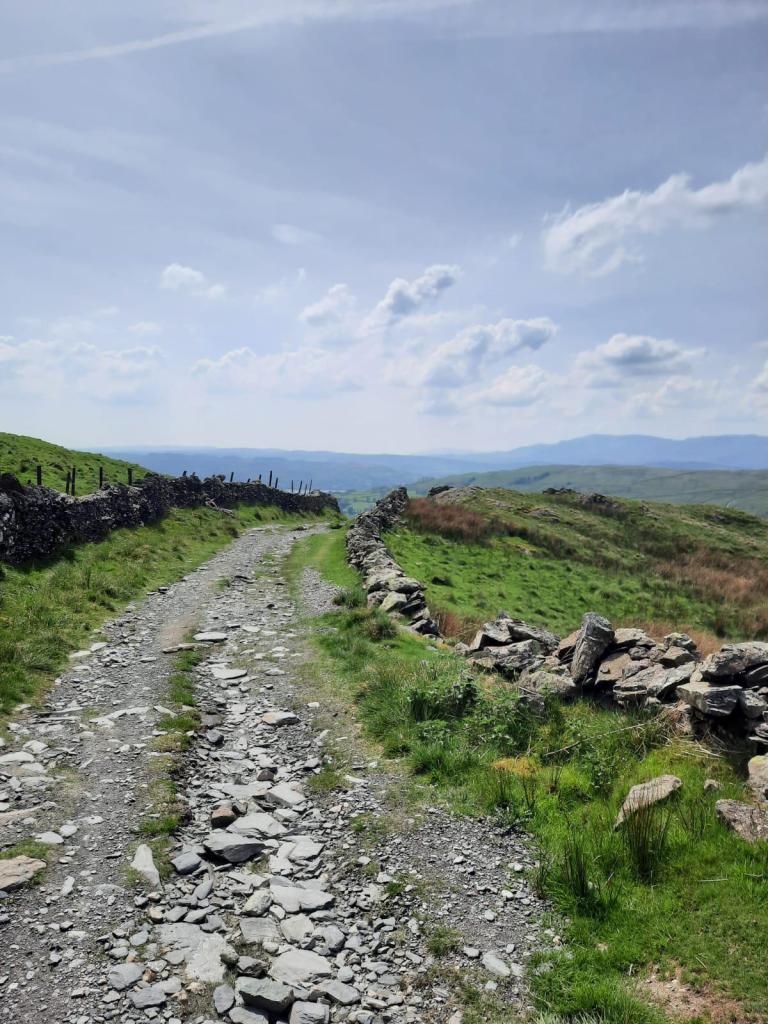
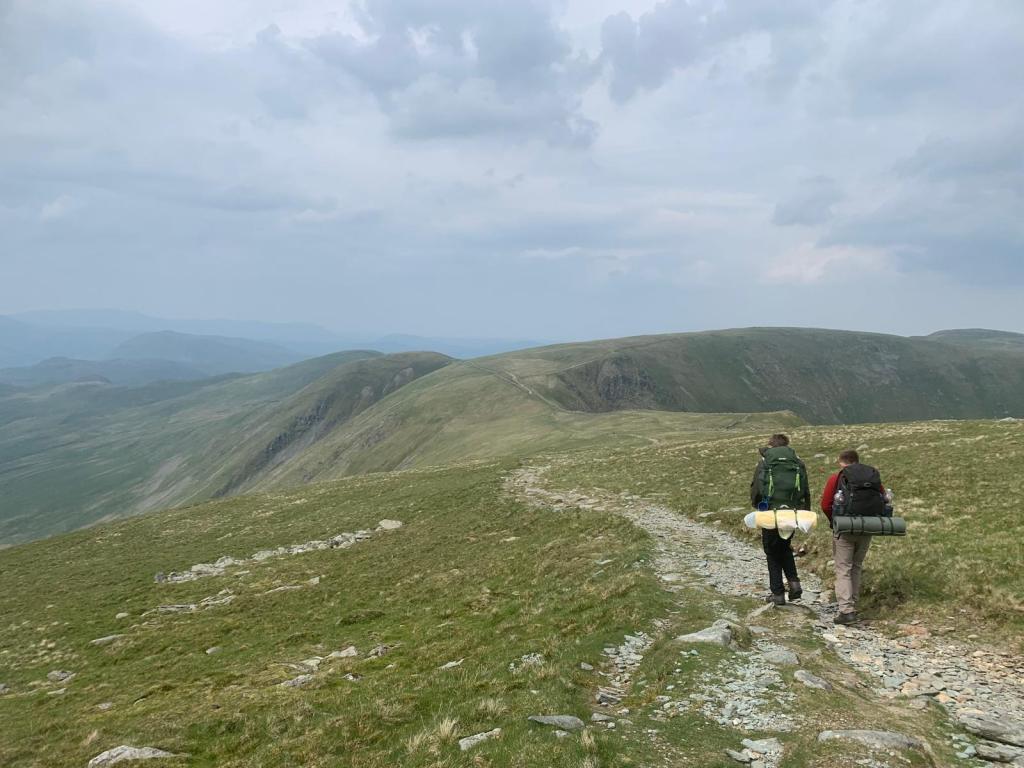
After not much sleep, it was time for day two! I wasn’t feeling quite so refreshed but I was looking forward to the challenge of another day of walking. Day two consisted of walking from Mosedale Cottage to Patterdale where we planned to use a campsite for the night. First, we had to retrace our steps back to Gatescarth Pass before heading onwards and up a Wainwright! When we reached the top of Harterfell, I was so pleased! To have bagged a wainwright whilst wearing a camping backpack felt like a great achievement as it is not something that I have ever done before. Harterfell is 778 metres and, whilst we didn’t start at 0 that morning, it still felt fabulous! From there, we headed to Mardale III Bell and up to High Street. The latter is a wainwright we have bagged before but, it was lovely to be up there again and also look down on the route we walked last time. You can check it out for yourself here. Those are the three wainwrights included in this route, completed in quick succession. You could also add in The Knott and the Angle Tarn Pikes too later on.
From High Street, we headed back down and alongside Angle Tarn which is breathtaking on a warm summers day. We were sad that we couldn’t take the opportunity to stop and swim but, we wanted to get into Patterdale and set up in good time to get dinner at a local pub. You never know what time they stop serving food! However, it was a lovely body of water to walk around before dropping down into Patterdale.
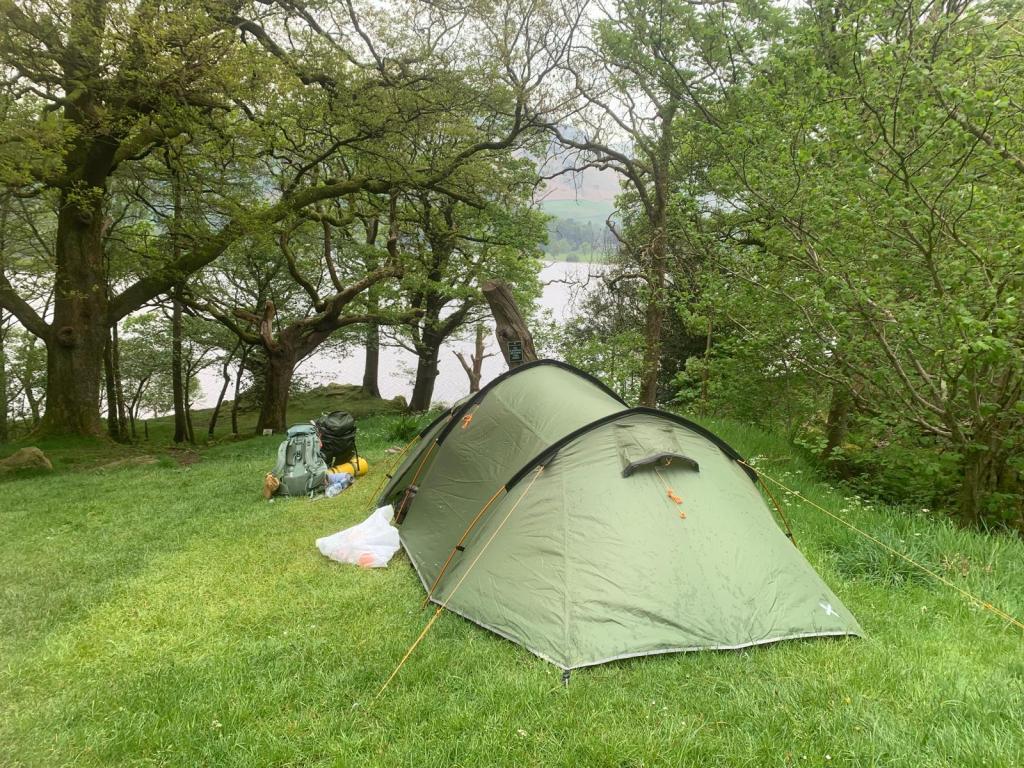
It is worth noting that the majority of this walk is on gravel paths and therefore, the bottom of my feet were really struggling at the latter end of day two. Walking on tracks is actually so much more difficult and hard on your feet, even if you have good walking boots on. It hurt to put one foot in front of the other at this point but, we kept pushing on and into Patterdale. The footpath actually brought you out right onto the farm that we were planning to camp at: Side Farm. This is a slightly more expensive campsite at £12 per person, rather than per tent however, the owners were really lovely and there were good facilities available. They can charge whatever they want for the fabulous location right next to Ullswater. Plus, we made it into the pub before the thunder started. What a day!

After dinner and a couple of pints at the pub, we tucked up in our tent for the night before walking into Glenridding to get the bus back to Windermere. You can get the bus directly from Patterdale but they don’t run that frequently so, we used the spare time to walk to Glenridding for some breakfast. It is completely up to you whether you walk the extra bit in the morning. As I said, it would also be possible to cut out the second night of camping but, this adds the extra element of making sure you’re at Patterdale in time for the bus so I’d say go prepared for an extra night, just in case.
It has been so long since I went wild camping and hiked in this way and I had such an amazing weekend. I gave blood (thanks rucksack for the hip blisters), sweat and tears on this walk as I do find things like this mentally challenging; it’s not easy! I would do it all again in a heartbeat regardless.
To have a closer look at the route, you can view it here on maps pedometer. As always, I’ve also included a step by step of the route below:

Start Point: Windermere Bus Station
Day 1:
- Head past Booth’s and the Tourist Information Centre to the main road.
- Turn right down the main road and then take the next exit on the left.
- Continue along this street, following it around to to the right and then keeping left to join a footpath.
- Follow this footpath past the school and into a woodland. Soon after entering the woodland, take the path to the right, through the gate. This will be signposted Causeway Farm.
- Keep to the left of the field, following the boundary wall until you meet a stile on the left. Head over the stile and into the next field.
- Head to the bottom right of this field where the path enters another small woodland area with a bridge over a stream.
- When the path joins a road, turn left and then head right through the farm.
- Follow the track out of the farmyard. You should soon reach another farm, following the signposts for the footpath throughout the yard.
- Once you’re back in the field, head left and follow the footpath to the next road.
- At Moorhead Road, complete a dogleg, going first right and then left down Longmire Road.
- Soon this becomes more of a rocky path that wouldn’t be possible for cars to travel down. Keep right and head uphill.
- At the top of the hill, the rocky path bends around to the right. Ignore this and continue straight towards the trees.
- Keep left at the woodland, continuing down this path as it dips down into the valley towards Kentmere.
- The path meets Hollin Lane, continue on down the road. Take the second footpath on the right. This almost appears like a driveway. If you reach the church, you have gone too far.
- When this path meets a road, turn left and continue towards the house. There is a footpath that skirts the edges of the house and heads down to the river. This is a great lunch spot!
- Cross the bridge over the river and keep left, following the path to the lane.
- Climb the stile directly opposite and continue on to the next lane.
- At High Lane, turn left and follow this road. After you have passed through a gate, follow the footpath on the right.
- Continue down this rocky path for around 2km, towards Sadgill.
- When it meets the road, cross the river and turn left up another rocky track called Gatescarth Pass heading uphill.
- Continue down this track for just under 3km. Soon, you will come to a signpost and a grass path to the right that crosses a small stream. Take this path on the right.
- Follow this grassy path to the Mosedale Cottage Bothy.
Day 2:
- Retrace your steps back to Gatescarth Pass. Once you meet the path, turn right to continue your journey.
- Head up the hill and continue down the track until you meet a crossroads. Then, take the path on the left towards Harter Fell.
- Continue down the path to Harter Fell.
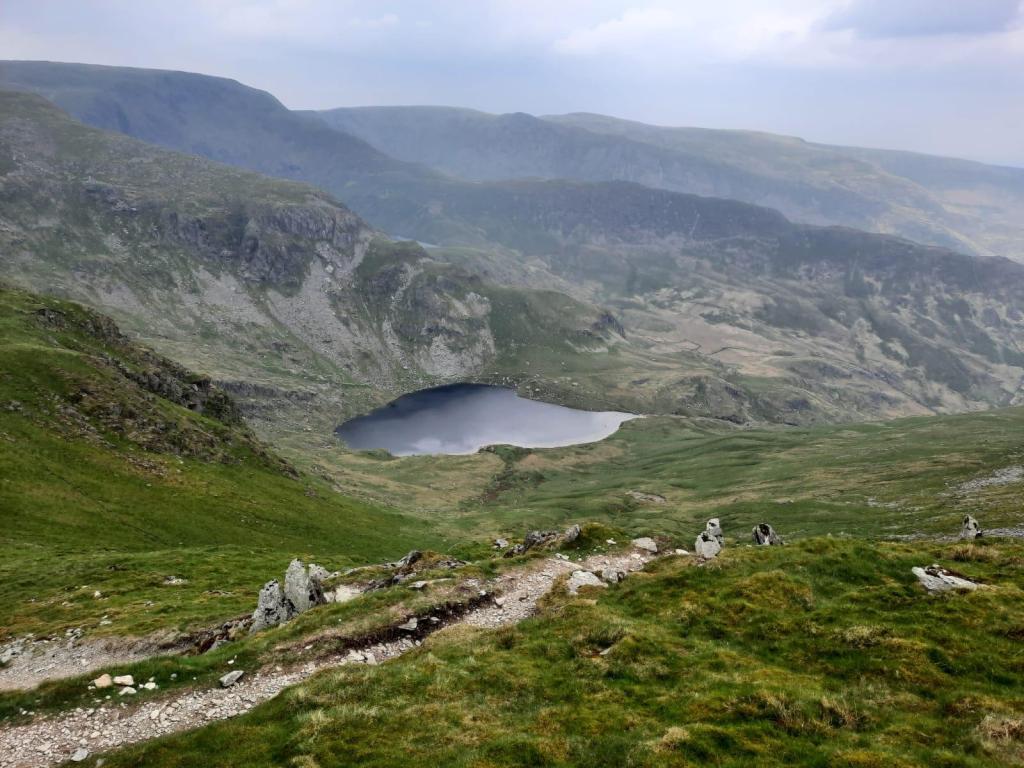
- At the park, turn left. On a clear day, you should be able to see Haweswater and High Street in the distance.
- Climb down the rocky path (nothing too difficult) to Mardale III Bell and back up towards High Street.
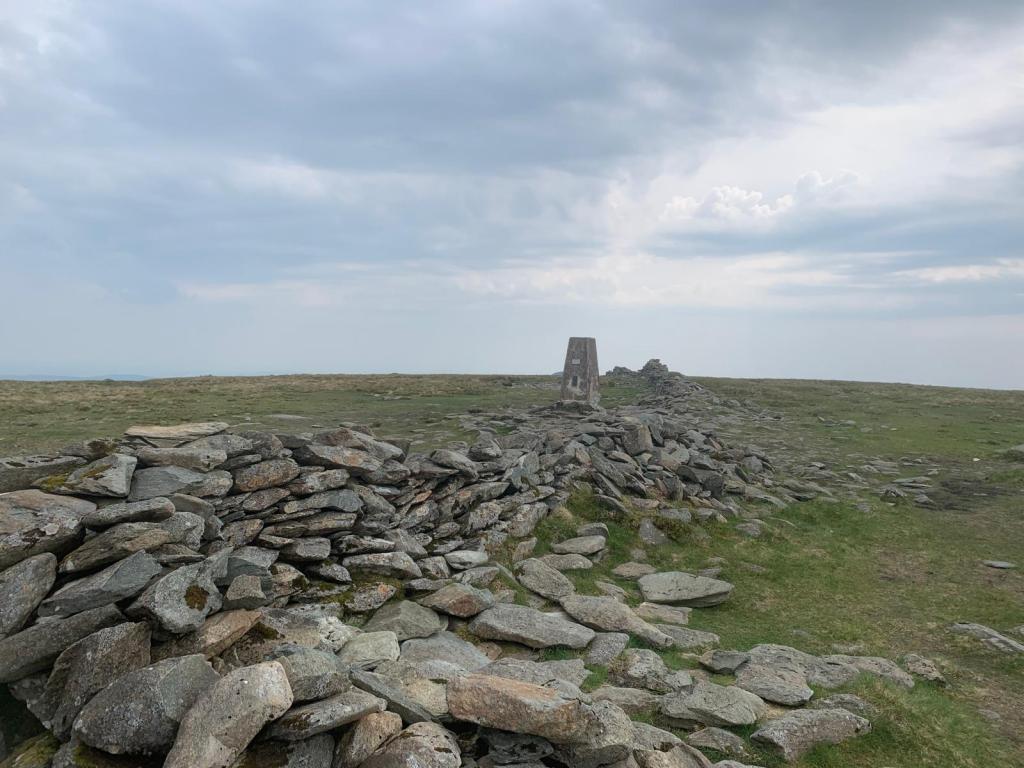
- High Street is a wainwright on a large plateau. Once you reach the trig point, cross to the left hand side of the wall (wall on your right) and continue down the path.
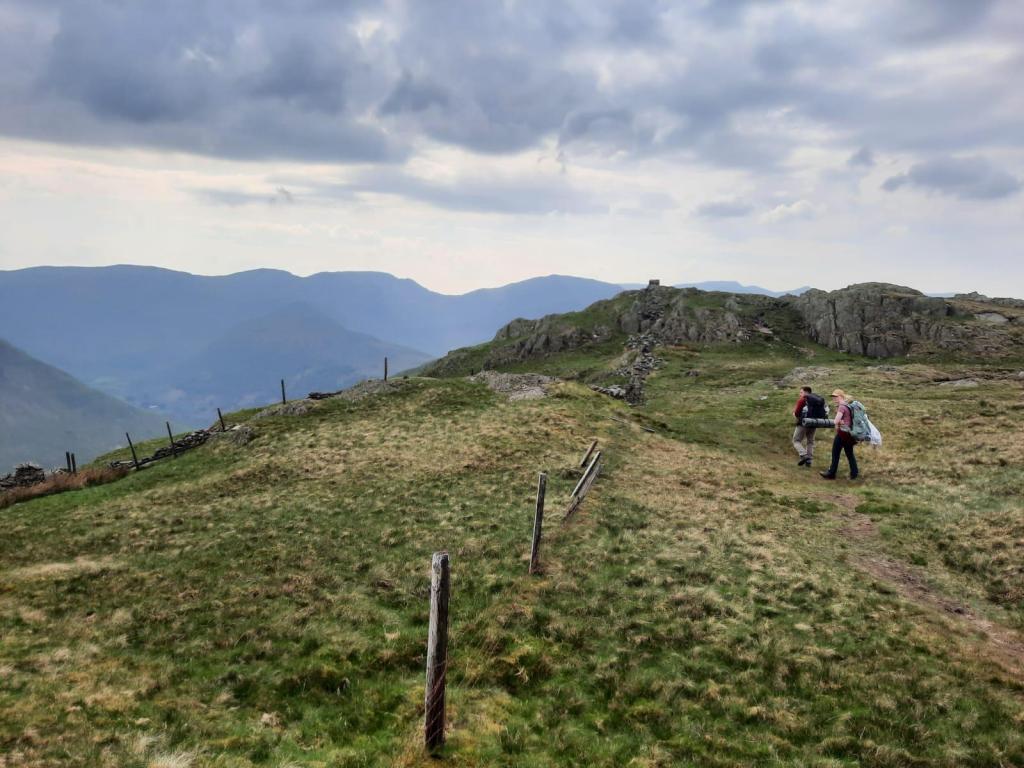
- Continue to follow this path. You should skirt The Knott on your left. Once you have passed The Knott, take the tarmac path.
- The tarmac doesn’t last long though and you’re soon back to the rocky/gravel paths that have been consistent throughout.
- Keep following this path as it skirts Angle Tarn, sticking left.
- Descend from Angle Tarn – the peak of Place Fell should be directly ahead of you.
- Once you reach the bottom of this valley, with the path up towards Place Fell ahead, turn left and take the path down towards Patterdale.
- Soon the path splits in two but, these seem to go to the same destination. We took the one of the left.
- The path passes an area of pine trees and enters Side Farm, where we camped for the night.
Day 3/End of Day 2
- Head out of the farmyard, down to the main road.
- At the main road, turn right and follow the road to Glenridding.
- At Glenridding, cross the bridge and head to the bus stop on the left to catch the bus back to Windermere.
End Point: Glenridding
As I said, you can have your end point in Patterdale too as the bus does pass through here but, I thought I would share exactly what we did regardless.
I hope you enjoy this route as much as we did!
Amie x

Leave a reply to Fairfield Horseshoe: 9 Wainwright and Views of Lake Windermere | Lake District – Explore with Amie Cancel reply