First up, I would like to apologise for the lack of content on my blog over the last month. Alex moved house and I was helping him; however, this meant I had no wifi for about two weeks and no data left on my phone either! We also spent a couple of weeks in the Lake District so you’ll be seeing lots of posts of the next months with walks and places to visit in that national park. Although I haven’t been posting, I’ve got so much content that is ready to be written that I am very excited to get back into it. If you are interested in following on with my trips as and when they happen, be sure to follow the Explore with Amie instagram. You’ll get more up to date information on there and I’m going to aim to post more going forward.
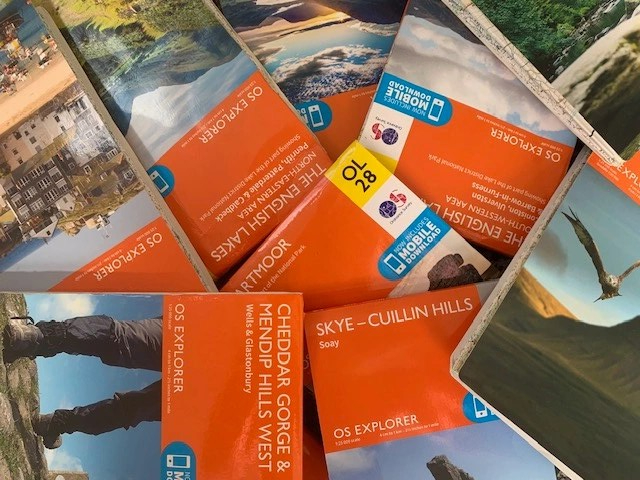
OS Maps, to me, are one of the most – if not the most – important tool in your walking toolbox. I am a firm believer that you should not head out without an OS Map unless it is a very easy path to follow. But, how do you know that if you haven’t walked the route yet? My walking routes are as informative and descriptive as I think is necessary but, you should always have a safety net nevertheless. That safety net is an OS Map and a compass. I’m going to be sharing with you my top tips for how to read an OS Map and how to use a compass to check you’re heading in the right direction.
The Basics
The first tip when you buy your first OS Map would be to familiarise yourself with the key. To be honest, most aspects of this are pretty self explanatory but, some information to start you off:
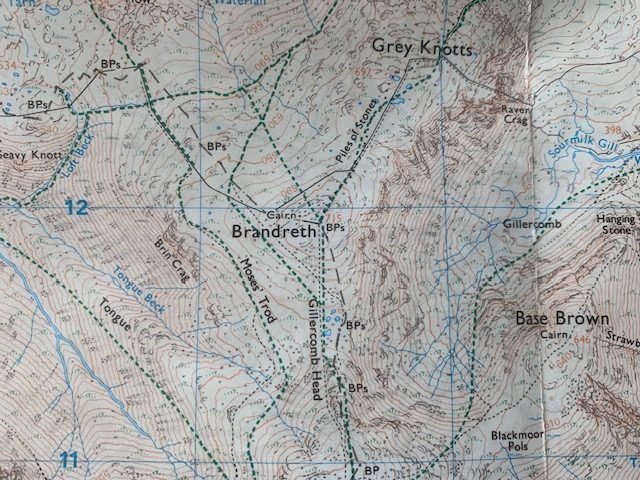
The green dashed lines on the map denote major pathways. The larger dashes are bridleways whilst the smaller are just footpaths. If these dashes have diamonds on them as well, it means that they are a recreational path or national trail. For example, the Cumbria Way in the Lake District.
Contour lines are the orange wiggling lines on the map. These represent the gradient of the land. The closer together these lines are the steeper the incline/descent. They also have the metres above sea level written on them. If you don’t want to be hiking up hillsides, pick a route where the contour lines are further apart. You can also see the height of major peaks on the map too.
The symbols are again easy to understand but a useful tool on the map. Where is the nearest car park to my walk? Is there a campsite nearby? More importantly, is that camp site close to a pub? These are all the things that the symbols can help you out with. Those are only a few of the ones you can find on the map; English Heritage sites, Tourist Information Centres and much more are on there too.
- Plot your walk before you go.
Before you head out on your walk, it is important to have a rough idea of the route you’re going to take. If I am going out on a day walk, we usually have a route in mind and an alternative to cut it shorter if we feel as if time is getting away from us a little bit. If you have looked at it on the map before hand, not only do you know where you’re looking when you’re on the walk, but it also helps to have it in your mind before you go. Alex is great at looking at the map and remembering key parts of the route. If you have a very visual memory like him, this will be especially useful. It also means that you know what you’re in for and can give yourself enough time, especially for those walks where you’re heading many hundreds of metres above sea level.
- Always know where you are on the map; follow the route as you go.
My top tip for using an OS Map is to follow the route as you go. Constantly keep an eye on the map so that you’re aware of where roughly you are along the path. The following tips will help you keep find key features that will help with this but the main thing is to stay aware and pay attention. We came across some walkers recently who had chatted away and found themselves in the opposite direction to what they intended. You don’t have to have your head stuck in the map the whole time but, whenever you come to a change in the path – ie. a stile, a fence or a change in direction – then double check your positioning.
- Orientate the Map
Don’t be afraid to refold the map in the way that makes it easiest to read. Keep it folded that way so that the area of the map you need is at the top for the entire walk – or at least, the area you currently are if it goes over. Also, make sure you’re turning the map so that it makes most sense for your direction of travel. It may seem obvious but, it is very helpful. Don’t be too precious about your maps. Ours have been folded every which way.
- Boundary walls/fences are your best friend.
One of the easiest ways to monitor your position along a path is to have a look at the boundary walls. Is your path following on the left or the right hand side of the wall? Does that wall make a right angle to the left? These are all things you can look out for and compare the picture on the map to real life. I’m not saying there will never be slight changes and an up to date OS map is always the best port of call but, they’re a good way – especially when it comes to old stone walls, – to keep on track. These are presented on the OS maps as solid black lines.

- Look out for other key features.
Is there a tarn on your right? Can you see a stone cross at the top of a small hill? There are so many other features that can help you locate your positioning and direction on the map. These features can also be really interesting things to go and have a look at. Assess the gradient on the map, is it easy to go have a look at? This is especially true for national park such as Dartmoor which are steeped in history.
There are also GPS apps that pair with OS Maps to keep track of where you are. However, technology is not always the most reliable so having a paper copy of a map is always a good idea as a backup. As well as that, I would recommend always taking a compass. We have only used a compass a handful of time but, it is a useful tool to have nonetheless. Using a compass is a skill that I have only just learnt how to do but it fairly easy once you know what you’re doing. The most important thing to bear in mind is that you have to know where you are on the map.
How to Use a Compass
- Start by making sure your map is the right way up as the top of the map always represents north.
- On the map, line the compass up to where you want to go. You should use the arrow on the base of the compass to point from where you are to where you want to go.
- Spin the bezel – the dial with the numbers that surrounds the compass – so that the N on the bezel is pointing to grid north. This is the top of the map; use the grid lines on the map to help you.
- Take the compass off the map (without moving the bezel) and turn yourself until the red needle aligns with north on the bezel. Where the direction of travel arrow is pointing is where you should be heading.
Due to declination, there is a slight difference between magnetic north and true north. However, this is to such a small degree that it is not worth mentioning. If you’re using a compass on your walks, it will not affect your journey as long as you’re not walking many many miles on the same bearing.
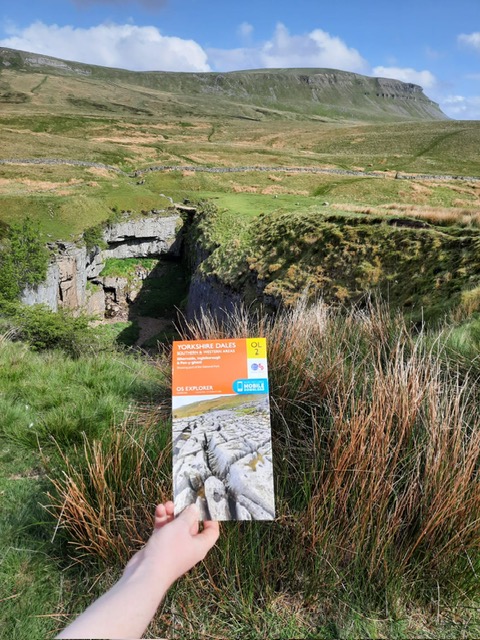
Compass readings are good to check your path is going in the intended direction or to find the right path if you’re at a crossroads or unsure of it’s exact location. We recently used a compass reading to descend from the Great Gable in the Lake District as, once at the top of the peak, we were unsure where exactly our path down was. The easiest way is to learn how to use a compass is to give it a try in a place you’re familiar with or practice when you already know where you’re going. The instructions make the process sound a lot more complicated than it actually is. This website is also a great resource and features a video from Steve Backshall.
In low visibility, compasses can be a lifeline. On Dartmoor, fog can descend quickly and, on occasion, we have used a compass to get us through a walk safety.
Implement these tips and practice with a compass and you’re good to go.
Amie x

Leave a comment